有網友詢問電子郵件發送不到Gmail的相關問題,我查了一下,大多數原因可能是Gmail連IPv6都要驗證的關係,雖說Gmail真的滿挑剔垃圾信件的(龍頭老大的權威?!),但最重要的還是要設定好SPF (Sender Policy Framework「寄件者政策架構」)、DKIM (DomainKeys Identified Mail「網域金鑰認證郵件」)、DMARC (Domain-based Message Authentication, Reporting & Conformance「網域型郵件驗證、報告與一致性」)三大防堵垃圾信的規則,只要設定好三大規則和rDNS (Reverse DNS「IP反解」)/也可稱之為PTR (Domain Name Pointer「指標記錄」),幾乎很難被判斷為垃圾信件 😱🥶🙀
接下來我做的範例是在一個使用子網域的CentOS 8系統上,用既有的Let’s Encrypt免費SSL證書,大約花10分鐘設定好Postfix使用TLS(Transport Layer Security「傳輸層安全性」)通訊協定,並且安裝OpenDKIM替伺服器簽署DKIM來防止被判斷為垃圾信件 🤓
### 首先無論如何一定要設定好rDNS/PTR,無論是自己設定或是找主機商,都一定要先設定好rDNS/PTR來增強電子郵件的可靠度,這對現今的DNSBL(Domain Name System-based Blackhole List)或是RBL(Remote Blackhole List)兩種主流的反垃圾信的黑清單列表服務是相對友好的,可以透過MxToolbox這個線上查詢工具來查詢IP是否被加入列表中;另外也很推薦到Google郵件管理員工具來驗證網域名稱擁有者 🏎🚄🚀
章節一、安裝、設定相關套件
# 安裝OpenDKIM、Postfix相關套件,並且移除sendmail 🤓
|
1 2 3 4 5 6 |
yum install -y dnf dnf-plugins-core epel-release redhat-lsb-core dnf install -y opendkim postfix telnet mailx mutt lsof curl perl net-tools yum-utils dnf remove -y sendmail dnf update -y systemctl enable opendkim && systemctl is-enabled opendkim systemctl enable postfix && systemctl is-enabled postfix |
### 因為我都是習慣用主機的子網域名稱做為主機名稱,所以只要替換好了驗證器名稱(lax7)與網域名稱(520.be),下方的指令存到筆記之後,可以很方便的設定好伺服器 🤖🤓🤖
# 修改主機名稱 🤓
sudo hostnamectl set-hostname lax7.520.be && sudo hostname lax7.520.be

exec bash

sed -i '/HOSTNAME/d' /etc/sysconfig/network

echo HOSTNAME=lax7.520.be >> /etc/sysconfig/network

cat /etc/sysconfig/network
# 修改hosts for IPv6,沒IPv6的用下方指令 🤓
|
1 2 3 4 5 6 7 8 9 |
rm -f /etc/hosts.bak mv -f /etc/hosts /etc/hosts.bak sudo bash -c "echo '127.0.0.1 localhost localhost.localdomain localhost4 localhost4.localdomain4 ::1 localhost localhost.localdomain localhost6 localhost6.localdomain6 `/usr/bin/curl -4 icanhazip.com` `cat /etc/hostname` `/usr/bin/curl -6 icanhazip.com` `cat /etc/hostname`' > /etc/hosts" clear cat /etc/hosts # vi /etc/hosts |
# 修改hosts for IPv4 🤓
|
1 2 3 4 |
sudo bash -c "echo '127.0.0.1 localhost localhost.localdomain localhost4 localhost4.localdomain4 `/usr/bin/curl -4 icanhazip.com` `cat /etc/hostname`' > /etc/hosts" clear cat /etc/hosts |
# 產生OpenDKIM的使用者,密碼部分要輸入兩次唷 🤓
adduser opendkim

passwd opendkim
# 產生OpenDKIM的金鑰,最重要的-s是指Selector (驗證器名稱),這個可以用來分別對子網域做DKIM,這邊需要將lax7替換成要指定的驗證器名稱,例如a001、b002之類的都任意 🤓
# -d 小寫的d是指所使用的網域名稱,需要使用主網域而不是子網域,這點請特別注意。 🤓
# -D 大寫的D是指輸出檔案到特定資料夾 🤓
# rm -fr /etc/opendkim/keys

mkdir -p /etc/opendkim/keys/520.be

opendkim-genkey -s lax7 -d 520.be -D /etc/opendkim/keys/520.be/
# 自訂OpenDKIM的白名單,這邊填上網域名稱或擁有多個IP 🤓
|
1 2 3 4 5 6 7 8 9 10 11 |
cat <<"EOF" > /etc/opendkim/TrustedHosts # OPENDKIM TRUSTED HOSTS 127.0.0.1 ::1 localhost 520.be lax7.520.be EOF clear cat /etc/opendkim/TrustedHosts # vi /etc/opendkim/TrustedHosts |
### 從這邊開始,接下來可以一次貼上一大堆指令 🏂🐱🏍🏄♂️
# 設定OpenDKIM相關資料夾、檔案的權限 🤓
|
1 2 3 4 5 6 |
cd /etc/opendkim/keys/520.be usermod -a -G opendkim opendkim chown -R opendkim:opendkim /etc/opendkim chmod go-rwx /etc/opendkim/* chmod -R 0600 /etc/opendkim/keys/520.be/* ls -al |
# 自訂OpenDKIM的驗證器(Selector)名稱、要通行的信箱名稱 🤓
|
1 2 3 4 5 6 7 |
cat <<"EOF" > /etc/opendkim/SigningTable # OpenDKIM SIGNING TABLE *@lax7.520.be lax7._domainkey.520.be EOF clear cat /etc/opendkim/SigningTable # vi /etc/opendkim/SigningTable |
# 自訂OpenDKIM金鑰存放的位置 🤓
|
1 2 3 4 5 6 7 |
cat <<"EOF" > /etc/opendkim/KeyTable # OpenDKIM KEY TABLE lax7._domainkey.520.be 520.be:lax7:/etc/opendkim/keys/520.be/lax7.private EOF clear cat /etc/opendkim/KeyTable # vi /etc/opendkim/KeyTable |
# 編輯OpenDKIM的設定檔 🤓
|
1 2 3 4 5 6 7 8 9 10 11 12 13 14 15 16 17 18 19 20 21 |
cat <<"EOF" > /etc/opendkim.conf ### BASIC OpenDKIM CONFIGURATION FILE LogWhy Yes Syslog Yes SyslogSuccess Yes Mode sv Canonicalization relaxed/simple ExternalIgnoreList refile:/etc/opendkim/TrustedHosts InternalHosts refile:/etc/opendkim/TrustedHosts KeyTable refile:/etc/opendkim/KeyTable SigningTable refile:/etc/opendkim/SigningTable SignatureAlgorithm rsa-sha256 Socket inet:8891@localhost PidFile /var/run/opendkim/opendkim.pid UMask 022 UserID opendkim:opendkim TemporaryDirectory /var/tmp EOF clear cat /etc/opendkim.conf # vi /etc/opendkim.conf |
# 重啟OpenDKIM 🤓
|
1 2 3 |
systemctl restart opendkim && systemctl status opendkim -l lsof -itcp -n -P | grep opendkim lsof -itcp -n -P | grep ":8891" |
### 可以一次貼上的指令到這裡,是不是省事很多 🐱👤🐱👤🐱👤
### 從這邊開始,接下來是設定Postfix,只要你是CentOS 8系統,接下來一樣可以一次貼上一大堆指令 🏂🐱🏍🏄♂️
# 備份Postfix設定檔main.cf 🤓
|
1 2 |
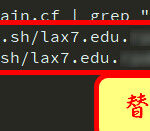
curl -sF 'clbin=<-' https://clbin.com < /etc/postfix/main.cf cp /etc/postfix/main.cf /etc/postfix/main.cf.bak |
# 編輯Postfix的main.cf設定檔,並且在最尾端增加啟用DKIM、TLS的設定 🤓
|
1 2 3 4 5 6 7 8 9 10 11 12 13 14 15 16 |
sed -i 's/^#myhostname = host.domain.tld/myhostname = lax7.520.be/g' /etc/postfix/main.cf cat /etc/postfix/main.cf | grep "myhostname =" sed -i 's/^#mydomain = domain.tld/mydomain = lax7.520.be/g' /etc/postfix/main.cf cat /etc/postfix/main.cf | grep "mydomain =" sed -i 's/^#myorigin = $mydomain/myorigin = $mydomain/g' /etc/postfix/main.cf cat /etc/postfix/main.cf | grep "myorigin =" sed -i 's/^inet_interfaces = localhost/inet_interfaces = all/g' /etc/postfix/main.cf cat /etc/postfix/main.cf | grep "inet_interfaces =" sed -i 's/^mydestination = $myhostname, localhost.$mydomain, localhost/# mydestination = $myhostname, localhost.$mydomain, localhost\nmydestination = $myhostname, localhost.$mydomain, localhost, $mydomain/g' /etc/postfix/main.cf cat /etc/postfix/main.cf | grep "mydestination =" sed -i 's/^#mynetworks = 168.100.189.0\/28, 127.0.0.0\/8/mynetworks = 192.168.1.0\/24, 127.0.0.0\/8/g' /etc/postfix/main.cf cat /etc/postfix/main.cf | grep "mynetworks =" sed -i 's/^#home_mailbox = Maildir\//home_mailbox = Maildir\//g' /etc/postfix/main.cf cat /etc/postfix/main.cf | grep "home_mailbox =" sed -i '$a\smtpd_use_tls = yes\nsmtpd_tls_auth_only = yes\nsmtpd_tls_loglevel = 1\nsmtpd_milters = inet:localhost:8891\nnon_smtpd_milters = \$smtpd_milters\nmilter_protocol = 2\nmilter_default_action = accept\nsmtp_tls_mandatory_protocols = !SSLv2, !SSLv3, !TLSv1, !TLSv1.1\nsmtp_tls_protocols = !SSLv2, !SSLv3' /etc/postfix/main.cf tail -9 /etc/postfix/main.cf |
### 可以一次貼上的指令到這裡 🐱👤🐱👤🐱👤
# 注意此處要填上fullchain檔案的完整路徑,且資料夾路徑的/斜槓之前一個字要加一個反斜槓\,路徑才會被正確解析 🤓
sed -i 's/^smtpd_tls_cert_file =.*$/smtpd_tls_cert_file = \/root\/.acme.sh\/lax7.520.be\/fullchain.cer/g' /etc/postfix/main.cf

cat /etc/postfix/main.cf | grep "smtpd_tls_cert_file ="
# 注意此處要填上SSL key檔案的完整路徑,且資料夾路徑的/斜槓之前一個字要加一個反斜槓\,路徑才會被正確解析 🤓
sed -i 's/^smtpd_tls_key_file =.*$/smtpd_tls_key_file = \/root\/.acme.sh\/lax7.520.be\/lax7.520.be.key/g' /etc/postfix/main.cf

cat /etc/postfix/main.cf | grep "smtpd_tls_key_file ="
# 如果沒有做IPv6的rDNS(PTR),編輯Postfix的main.cf設定檔,強制使用IPv4傳輸比較好對付挑剔的Gmail 🤓
|
1 2 |
sed -i 's/^inet_protocols =.*$/inet_protocols = ipv4/g' /etc/postfix/main.cf cat /etc/postfix/main.cf | grep inet_protocols |
# 重啟Postfix 🤓
|
1 2 3 4 |
systemctl restart postfix && systemctl status postfix -l lsof -itcp -n -P | grep master lsof -itcp -n -P | grep ":25" lsof -itcp -n -P | grep ":587" |
章節二、添加相關的DNS記錄
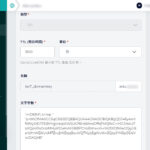
### 接下來到DNS服務商的網站將DKIM、DMARC、SPF三條記錄加上,然後稍後測試發信,由於我的網域幾乎都轉到Gandi,這邊是範例,首先讀取一開始產生的OpenDKIM的公開金鑰 🤖🤖🤖
cat /etc/opendkim/keys/520.be/lax7.txt
# 將p=後面一大串的數字替換到下方DKIM同樣p=的內容,然後添加到DNS服務商 ⛷
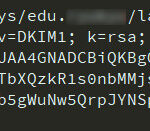
lax7._domainkey 1800 IN TXT "v=DKIM1; k=rsa; " "p=MIGfMA0GCSqGSIb3DQEBAQUAA4GNADCBiQKBgQCebFp0On19i9mkwNRLUD/IpvtvQZsKykILf9xGDiWnpYrYy2hUMQrsMApJedzH0g5A5FNmUqDOZu73M+QnHX9j8G7tje0CJhrIUBHh+5LYhQcmlTAwSqhes21L661sGk9XtO5KvnvYt0dbDr7c+yb8FlBXgM3VfJd7mQaPCGsYYwIDAQAB"
# 添加SPF記錄,注意SPF的部分要分別設定好IPv4/v6喔 🏂
lax7 1800 IN TXT "v=spf1 ip4:104.148.40.50 ip6:2001:470:c:995::2 ~all"
# 添加DMARC記錄 🏇
_dmarc.lax7.520.be 1800 IN TXT "v=DMARC1; p=quarantine; sp=quarantine"
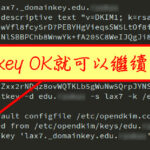
# Gandi的DNS大約1到10分鐘內就能解析,所以喝口水、站起來動一動再回來驗證密鑰,只要看到最後出現key OK的字眼,就可以測試發信了 🥤🍩☕
host -ttxt lax7._domainkey.520.be

dig txt +short lax7._domainkey.520.be

opendkim-testkey -d 520.be -s lax7 -k /etc/opendkim/keys/520.be/lax7.private -v -v -v
### 驗證方法,最簡便的就是verifier.port25.com了,將xxoo替換成你的gmail前輟就行啦,port25.com就會將測試報告寄過來,另外也寄一封信到自己的gmail做測試 👺
echo "DKIM Test" | mutt -s "DKIM Test" check-auth-xxoo=gmail.com@verifier.port25.com

mail -vs "DKIM Test" check-auth@verifier.port25.com < /dev/null
echo "BACKUP" | mutt -s "BACKUP" xxoo@gmail.com -a "/etc/resolv.conf"

tail -20 /var/log/maillog
# 另外還有其他幾個相同性質的測試網站 🤓
章節三、結語
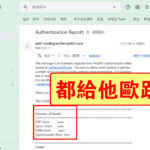
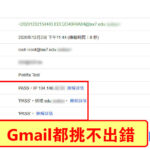
# 其實這些操作都不難,很容易就能大功告成的,難的是思路(一點思路都沒有就是多看書多吸收知識👹),有時就是會鬼打牆陷進某種不可說的循環 XD 另外如果你檢查原始郵件檔案的標頭,會看到dkim=pass、spf=pass、dmarc=pass三大規則都通過了 🤖🤓🤖
Authentication-Results: mx.google.com;

       dkim=pass header.i=@520.be header.s=lax7 header.b="GhAq/X84";

       spf=pass (google.com: domain of root@lax7.520.be designates 104.148.40.50 as permitted sender) smtp.mailfrom=root@lax7.520.be;

       dmarc=pass (p=QUARANTINE sp=QUARANTINE dis=NONE) header.from=520.be

Received: by lax7.520.be (Postfix, from userid 0) id D6FFA40F6A84; Fri,

  4 Dec 2020 11:48:36 +0800 (CST)

DKIM-Signature: v=1; a=rsa-sha256; c=relaxed/simple; d=520.be; s=lax7; t=1607053716; bh=5g22i38m5ab1CDk2XO5BVyX7c5UtL2kHd7C21wyYSZE=; h=Date:To:Subject:From; b=GhAq/X84Nqs4BT2cz4CG5GkusJmOryR5vx1slte5lUKZzw+dMZuR2a9vDIJRgUSpC

	 +iwY6ls26AW+9EXsYXyddK2g+5NJ8CX7zYVqfzOgj6ySRCYEPlKhSmBZcYK5RxodJh

	 6bBsuJVq7FIq4AGoeVvP9E8aGZuA6hk9o3FzMuzM=

Date: Fri, 04 Dec 2020 11:48:36 +0800

To: xxoo@gmail.com

Subject: Postfix Test

User-Agent: Heirloom mailx 12.5 7/5/10

MIME-Version: 1.0

Content-Type: text/plain; charset=us-ascii

Content-Transfer-Encoding: quoted-printable

Message-Id: <20201204034836.D6FFA40F6A84@lax7.520.be>

From: root
# SpamAssassin的標頭結果如下,雖然我這台VPS的rDNS/PTR還沒設定好,但結果還是負分-55,可以順利進入收件箱;先試著做一次,之後將操作紀錄存在記事本,很方便操作的 🍻🍺🍻
Return-Path:
Delivered-To: admin@xxoo.xxoo
Received: from arrow.mxrouting.net
by arrow.mxrouting.net with LMTP
id kPiiFdTHyV/CUAAATRu94g
(envelope-from
for
Return-path:
Envelope-to: admin@xxoo.xxoo
Delivery-date: Fri, 04 Dec 2020 06:23:32 +0100
Received: from xiaohe1.4iuhi.top ([104.148.40.50] helo=lax7.520.be)
by arrow.mxrouting.net with esmtps (TLS1.2) tls TLS_ECDHE_RSA_WITH_AES_256_GCM_SHA384
(Exim 4.94)
(envelope-from
id 1kl3Z5-0006nj-UZ
for admin@xxoo.xxoo; Fri, 04 Dec 2020 06:23:32 +0100
Received: by lax7.520.be (Postfix, from userid 0)
id 9567640F6A84; Fri, 4 Dec 2020 13:23:29 +0800 (CST)
DKIM-Signature: v=1; a=rsa-sha256; c=relaxed/simple; d=520.be; s=lax7;
t=1607059409; bh=Axz2UOhEIqTuGOd8EYt6W3BJ1kk8HwljY6RakfeOtsk=;
h=Date:From:To:Subject;
b=hw+03di2vuU3WgbC64JE1YyFKsTcqLqdeXDPYrSCKC/tThgOFaiNElaXC8dOiIE5d
jnG7f9Zl+LtmavcJ+YFN3PB4GhYgUFRn9Uz8g0jqJiB8zyIeEu8Je4Ho2WnZQLDbNv
OjaOSuc0f/21bGbD7FCsKPQdqQqaCIQaL5vfWjgk=
Date: Fri, 4 Dec 2020 13:23:29 +0800
From: root
To: admin@xxoo.xxoo
Subject: BACKUP
Message-ID: <20201204052329.GA746738@lax7.520.be>
MIME-Version: 1.0
Content-Type: multipart/mixed; boundary="sdtB3X0nJg68CQEu"
Content-Disposition: inline
User-Agent: Mutt/1.10.1 (2018-07-13)
Forward-Confirmed-ReverseDNS: Reverse and forward lookup success on 104.148.40.50, -10 Spam score
SPFCheck: Server passes SPF test, -30 Spam score
X-DKIM: signer='520.be' status='pass' reason=''
DKIMCheck: Server passes DKIM test, -20 Spam score
X-Spam-Bar: /
SpamTally: Final spam score: -55
ref.
- NCC – 郵件過濾
- HiNet IP反解服務使用說明
- 被gmail判成垃圾信件原因與建議處理方式
- CentOS Wiki – zh-tw/HowTos/Amavisd
- CentOS Wiki – zh-tw/HowTos/postfix_sasl
- Postfix TLS Support
- How to Set Up OpenDKIM on CentOS 8/RHEL 8 Mail Server
 列印本文
列印本文
 逆向行駛 最愛的最殘酷、最美的最虛無
![[animagine-xl-3.1] Hawaii, USA - 007](https://520.be/wp-content/uploads/2020/12/animagine-xl-3.1-Hawaii-USA-007-660x330.jpg)


![[animagine-xl-3.1] Hawaii, USA - 002](https://520.be/wp-content/uploads/2020/12/animagine-xl-3.1-Hawaii-USA-002-310x165.jpg)